
Introduction/Abstract
One of my recent interests, especially in researching easy and affordable ways to teach environmental science, is learning about citizen science. By allowing people to participate and play a bigger part in science, they’re able to become more invested in the progress of science. As technology advances, citizen science has become more accessible, propelling conservation efforts forward. One of the technologies I came across was a Raspberry Pi. In the simplest terms, a Raspberry Pi is a cheap, tiny computer designed to run 24/7 doing basic tasks. As I dug deeper into this topic, I learned about how scientists were able to do amazing things with these computers. Bird calls were recorded, analyzed, and identified all with a pocket sized device costing less than $100 USD. Temperature and humidity were able to be monitored in beehives, helping beekeepers care for their colonies. One of the very first projects I did after picking a Raspberry Pi was create a low cost wildlife camera.
Why You Shouldn’t Hug Bears (Or Other Wildlife!)
If you have been on social media, you may have seen a lot of videos or clips about people feeding local wildlife. Although at first glance, this may seem like a scene out of a fairytale, there’s a lot that can go wrong from interactions. These raccoons, crows, even bears can get used to seeking out humans for food and although you might have no problem with that, there are a lot of people who don’t think the same way. This leads to these animals getting labeled and captured as a nuisance and they end up in one of two places. The most common outcome is that animal getting euthanized. It is deemed unsafe for them to be released back into the wild since they can end up back in towns and houses looking for food. The second outcome for the lucky few end up in animal sanctuaries. However there are very limited spots and there is no way to perfectly replicate the animal’s natural habitat.
So feeding wildlife is a huge red flag right? By sharing this cheap and easy to set up wildlife camera, I’m hoping to provide the resources needed to safely take a closer our furry, feathery, or scaly neighbors. I’ll be sharing my experience with setting up some wildlife cameras with a Raspberry Pi as well as ways this can expand outreach
Set Up
There are a couple ways to get these supplies. I am lucky enough to live close by a Microcenter, a computer/tech store that sells Raspberry Pi supplies but there are quite a few resellers like PiShop.US. I’ve also included a list below of what supplies I’ve used.
- Raspberry Pi Zero 2 W ($15)
- Micro USB Power Supply (~$8)
- Raspberry Pi Camera ($15 – $25)
- Raspberry Pi Camera Cable ($2)
- Micro SD card and adapter (~$12)
- Raspberry Pi Case (Optional) ($5)
Total: ~$70 ($57-$67)
As you can see, this camera doesn’t cost much more than a regular security camera. However, the benefits of learning exactly how the camera works, not being locked into using a company’s software, and the small form factor far outweighs the extra money you would save. As for software, I’ve explored many ways of setting a camera with the Raspberry Pi and this video below has been the simplest, most consistent way of getting a camera set up.
Using Camera
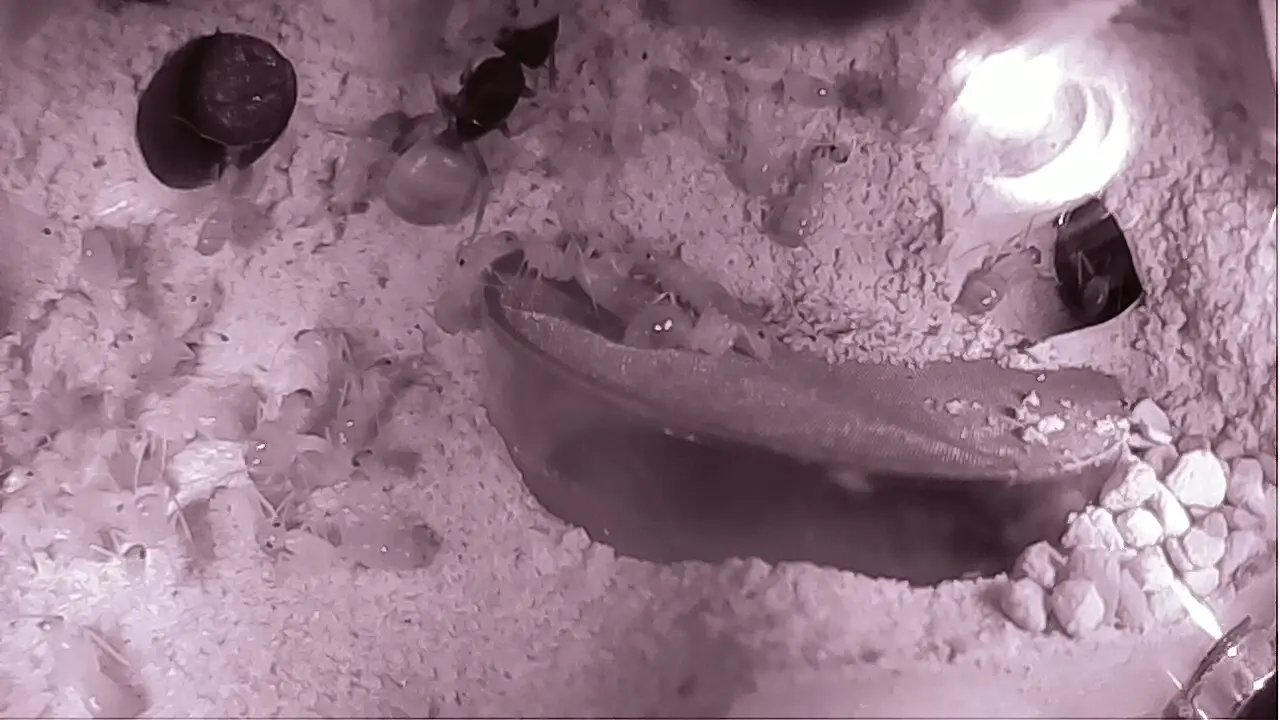
After following the video guide above, I had a URL that I could visit anywhere on my home internet and look through the camera. As I had recently gotten an ant farm, I set it up to have a constant way to monitor the colony without disturbing them. Before the camera, every time I checked the colony, they would panic and start moving eggs and brood out of their nest. After setting up the camera, I was able to watch more of the ant’s natural behavior. They would sometime bring food into the nest, feed each other, and if I was lucky I would sometimes see a new ant emerge from its cocoon. However, I wanted to push the limits. I wanted to find a way to view my ants from anywhere in the world.
I will say, this next step is completely unnecessary. Many people would and should be happy with being able to look at pets and wildlife from the safety of their own home. However one of my goals is figuring out how a system like this could be accessible to a wide audience. I wish I could say that I found a clever, money saving trick to help you share your own wildlife cameras but unfortunately, that’s not the case. The solution I settled on upgrading my set up from a Raspberry Pi Zero ($15) to a Raspberry Pi 5 ($50). With the extra power that the Raspberry Pi 5 gives me, I was able to set up a very simple Youtube Live stream! This requires a little bit more knowledge about Linux and shell scripting (which I am by no means an expert), but it was relatively simple to set up! Below is video of a livestream! Unfortunately I’m having some trouble with the 24/7 livestream but working on a fix soon!
Another option I tried was buying a mini PC such as this one and setting up a free livestream on Twitch (or other platforms)! From there I was able to link that stream directly to website just like this one! The program I would recommend running on a mini PC is Open Broadcaster System (OBS) since you’re able to customize exactly what your livestream would look like. This method is a little easier since it’s using Windows and pretty intuitive software! It’s also much easier to customize with borders, music, and other livestream options! If you’re looking for an easy way to share your nature cams, this might be a good way to do that!
Lesson Plan Ideas
Using this set up, I tried coming up with a couple different lesson plans adapted to different age groups that could be implemented over a couple weeks. If you read my About Me page or my page on my senior project, you’ll learn that I initially started WILD Education as a way to record lesson plans and inspiration for environmental education.
Elementary Grade Levels
For younger students, in elementary grade levels, I would heavily tie this project in with the importance of not interacting with wildlife. Especially with social media becoming such a major part in people’s lives, including children, it’s important to fight misconceptions at an early age. Setting up this at a corner of the school or even at a local park with bait to attract certain animals like birds and squirrels (I wouldn’t try to attract anything bigger than that). Although this is a simple and short introduction, the next lessons can build on this system and introduce more complex concepts.
Middle School Grade Levels
For older students, middle school grade levels, I wanted to introduce more scientific concepts. The first experiment that could be run with a local wildlife cam involves introducing the food web. By baiting the camera with different foods, students are able to build their own food web with animals they’ve seen. For example, the first day/night can be baited with fruits and the types of animals can be records. Nuts, vegetables, and even insects are also good ideas for bait. Another great lesson to connect with this is evolution. Setting up a bird feeder with different sized seeds and recording which birds are attracted to each seeds. Spoilers! Smaller seeds should attracts birds with smaller beaks like finches or sparrows while larger seeds should attract birds with larger beaks such as crows. Changing the location of the bird feeder is also a good variable to change! Asking questions like “What are some differences between ground dwelling and tree dwelling birds?” A helpful direction can be talking about beak sizes and shapes! I would definitely recommend doing some tests before doing them with students as I’m sure you’ll get different birds than me.
High School Grade Levels
With older students, high school grade levels, things can be much more interactive and complex. At this level, I would recommend trying to find a local nature reserve where more animals can be attracted safely (emphasis on safety! You don’t want to start attracting opossums and raccoons to schools). Make sure to get permission from the nature reserve as well! The first thing I would try to do is create a bigger, more complete food web. This might require some critical thinking from your students. Asking students to first choose which baits to use, which animals they expect to see, and where to place baits are all ways to to get students involved.
Conclusion
I know that many of the lesson plans I came up with revolve around students in high school or younger but the foundation of these lesson can be adapted and so many things can stem from this camera set up. Personally, my next steps would be setting up a motion detection system with motioneye or learning more about the Raspberry Pi AI Camera. For my ant colony, I believe there might be a way to set up a counter to get an estimate on how big the colony has grown. The possibilities are endless and I would love to hear more about what projects you come up with! I’ve got my Contact page if you want to share!
